 Save to Pinterest
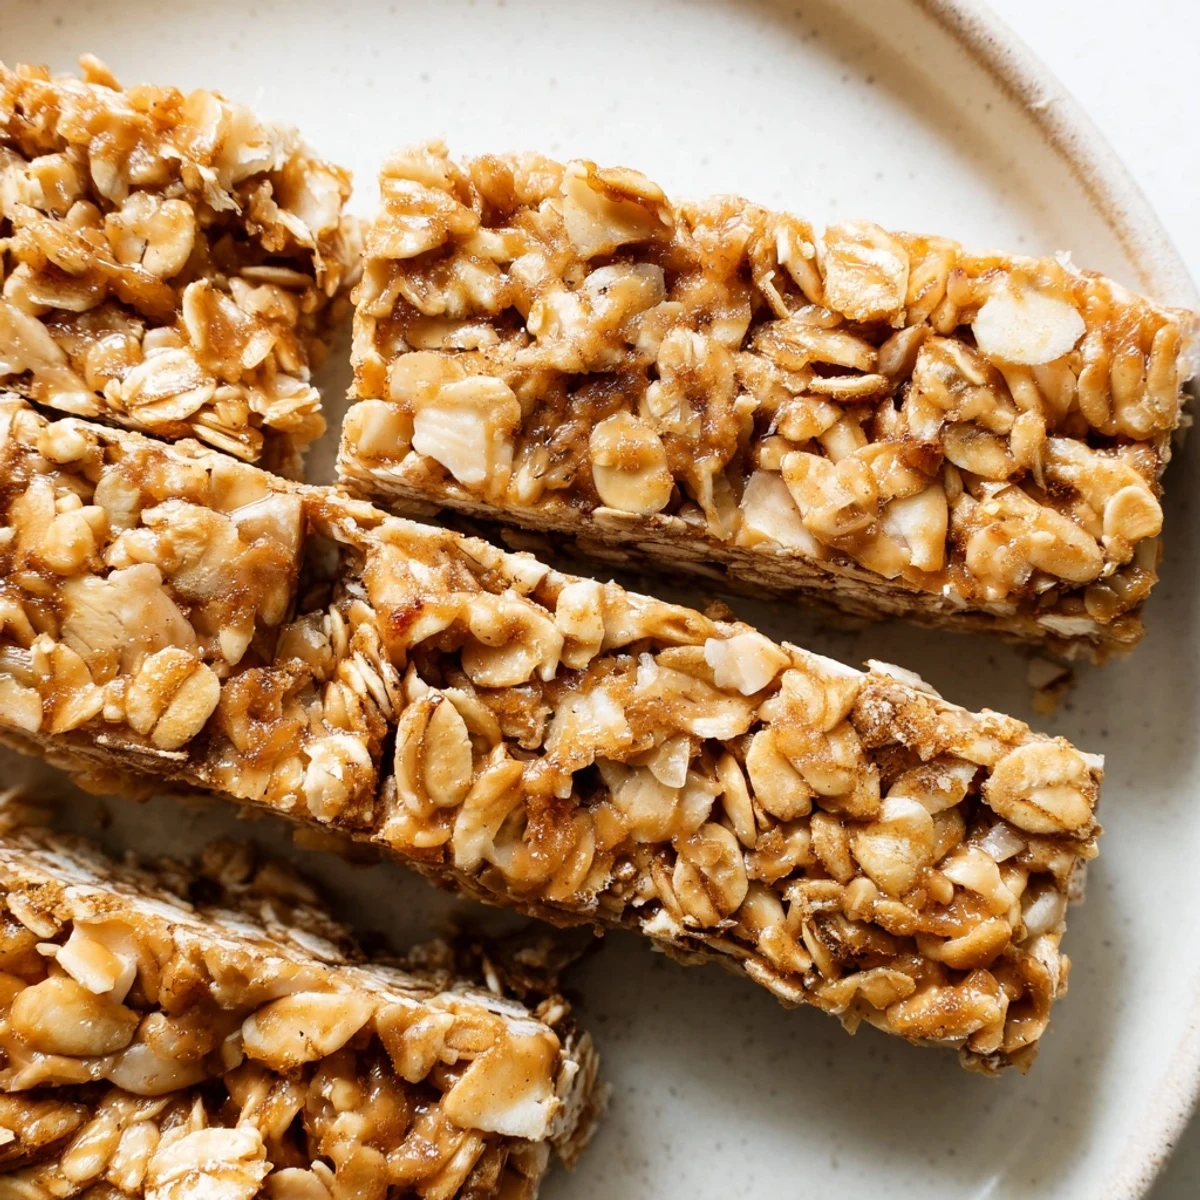
 These wholesome granola bars combine old-fashioned rolled oats, crispy rice cereal, and chopped dried apple with creamy peanut butter and honey. The mixture presses into a pan and chills until firm, creating perfectly portable bars that hold together beautifully. Each bite delivers chewy texture from the oats, sweetness from fruit and honey, and rich nuttiness from peanut butter.
The no-bake method means zero oven time—just warm the wet ingredients until smooth, combine with dry ingredients, press firmly into your pan, and refrigerate for one hour. Customization is simple: swap sunflower seed butter for nut-free, add chocolate chips or seeds, or use maple syrup for vegan variations. Bars keep refrigerated for up to a week, making them ideal for meal prep or grab-and-go snacking.
The first time I made these, it was a Tuesday evening and I was craving something wholesome but refusing to turn on my oven in July. My kitchen was already warm from summer heat, and the thought of baking anything felt like too much. These bars came together in minutes, and that first chewy, apple-spiced bite made me wonder why I ever bothered with baked versions at all.
Last autumn, my sister came over to help me meal prep for the week. We made a double batch, listening to podcasts and drinking tea while the kitchen filled with cinnamon and vanilla. She took half the batch home, and texted me two days later saying they were already gone and she needed the recipe immediately.
Ingredients
- 2 cups old-fashioned rolled oats: These provide the hearty base and chewy texture that holds everything together beautifully
- 1 cup crispy rice cereal: Adds lightness and prevents the bars from becoming too dense or heavy
- 1/2 cup dried apple finely chopped: The star ingredient that gives natural sweetness and pockets of fruity flavor
- 1/3 cup unsweetened shredded coconut optional: Toasted coconut adds lovely texture and a subtle tropical note
- 1/4 cup chopped peanuts optional: Provides crunch and pairs perfectly with the peanut butter base
- 1/2 teaspoon ground cinnamon: Warm spice that bridges the gap between apple and peanut butter flavors
- 1/4 teaspoon salt: Essential to balance the sweetness and highlight all the flavors
- 1/2 cup natural creamy peanut butter: The binding agent that holds everything together with rich nutty flavor
- 1/3 cup honey or maple syrup: Natural sweetener that acts as glue while adding subtle floral notes
- 2 tablespoons coconut oil melted: Helps firm up the bars when chilled and adds a hint of coconut flavor
- 1 teaspoon pure vanilla extract: Rounds out all the flavors and makes everything taste more complete
Instructions
- Prepare your pan:
- Line an 8x8 inch baking pan with parchment paper letting the ends hang over the sides like handles. This will make lifting the bars out effortless later.
- Mix the dry ingredients:
- In a large bowl combine oats rice cereal dried apple coconut peanuts cinnamon and salt. Use your hands to break up any clumps of dried fruit.
- Melt the wet mixture:
- Warm the peanut butter honey and coconut oil in the microwave or on the stove until smooth and pourable. Stir in the vanilla once removed from heat.
- Combine everything:
- Pour the warm liquid over the dry ingredients and stir thoroughly. Keep mixing until every single oat and piece of cereal is coated in the sticky mixture.
- Press firmly into the pan:
- Transfer the mixture to your prepared pan and press down firmly with a spatula or your hands. Compact it tightly so the bars hold together properly.
- Chill until firm:
- Refrigerate for at least one hour until completely set. The firmer you press them now the better they will hold their shape later.
- Cut and store:
- Lift the bars out using the parchment overhang and cut into 12 equal pieces. Store them in the refrigerator in an airtight container.
 Save to Pinterest
 My three year old nephew helped me make a batch once and took his job of pressing the mixture into the pan very seriously. He now calls them his special bars and asks to make them every time he visits.
Make Them Your Own
The beauty of these bars is how easily they adapt to whatever you have in your pantry. Sometimes I swap the dried apple for chopped dates or add chocolate chips for a dessert version. The recipe is forgiving and creative experimentation almost always pays off.
Storage Secrets
I learned the hard way that these bars do not travel well at room temperature during summer. They become soft and can lose their shape. Keep them chilled until right before serving or pack them with an ice pack for lunchboxes and road trips.
Serving Suggestions
These bars are perfect for breakfast on busy mornings or as an afternoon snack with tea. I love crumbling one over yogurt for a quick parfait or dipping the edges in melted chocolate for a special treat. They are substantial enough to keep hunger at bay for hours.
- Try warming a bar for 10 seconds in the microwave for a freshly baked texture
- Crumble them over oatmeal or smoothie bowls for extra crunch
- Wrap individually in parchment for grab and go convenience
 Save to Pinterest
 These bars have become my go to for meal prep because they are so reliable and always hit the spot. I hope they become a staple in your kitchen too.
Recipe FAQs
- → How long do these bars need to chill?
-
Refrigerate for at least 1 hour until completely firm. The chilling time helps the bars hold their shape when cutting. For best results, avoid rushing this step.
- → Can I make these nut-free?
-
Absolutely. Substitute sunflower seed butter for the peanut butter and omit the chopped peanuts. The texture and binding will work just as well with this simple swap.
- → What's the best way to store these bars?
-
Keep in an airtight container in the refrigerator for up to one week. The cold helps maintain their shape and chewy texture. They can also be frozen for longer storage.
- → Why do I need to press the mixture so firmly?
-
Firm pressing compacts the ingredients so the bars hold together when cut. Use the back of a spatula or your hands to press evenly and tightly into the pan corners.
- → Can I use quick oats instead of old-fashioned?
-
Old-fashioned rolled oats provide better texture and chewiness. Quick oats may make the bars softer and less substantial. Stick with old-fashioned for best results.
- → What if my bars are crumbly when cutting?
-
This usually means they weren't pressed firmly enough or didn't chill long enough. Return the mixture to the pan, press more tightly, and chill longer before cutting again.
