 Save to Pinterest
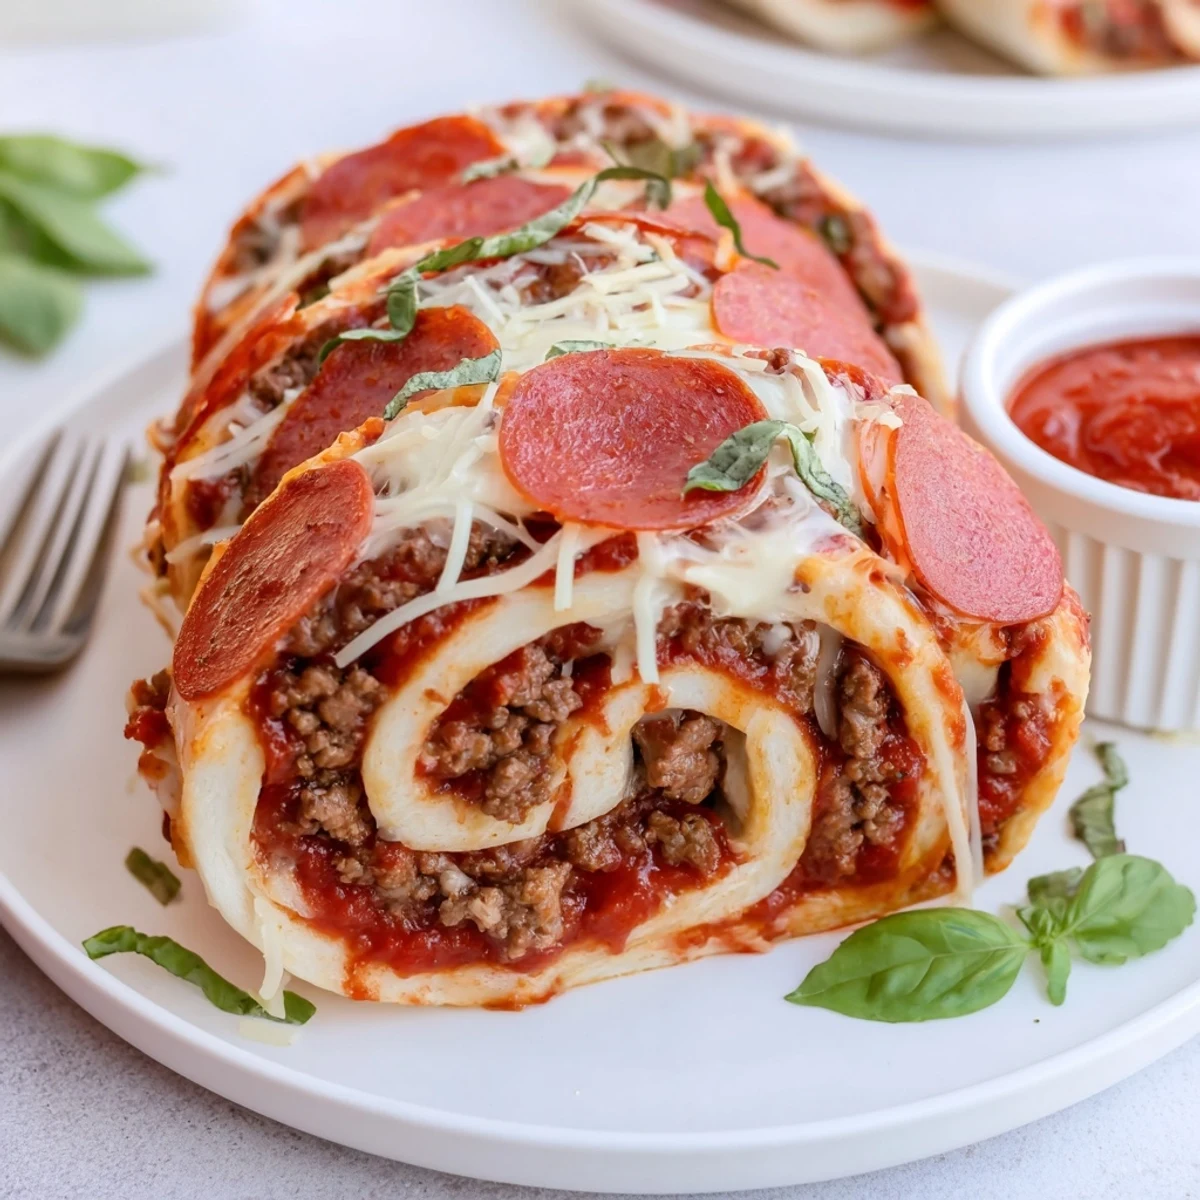
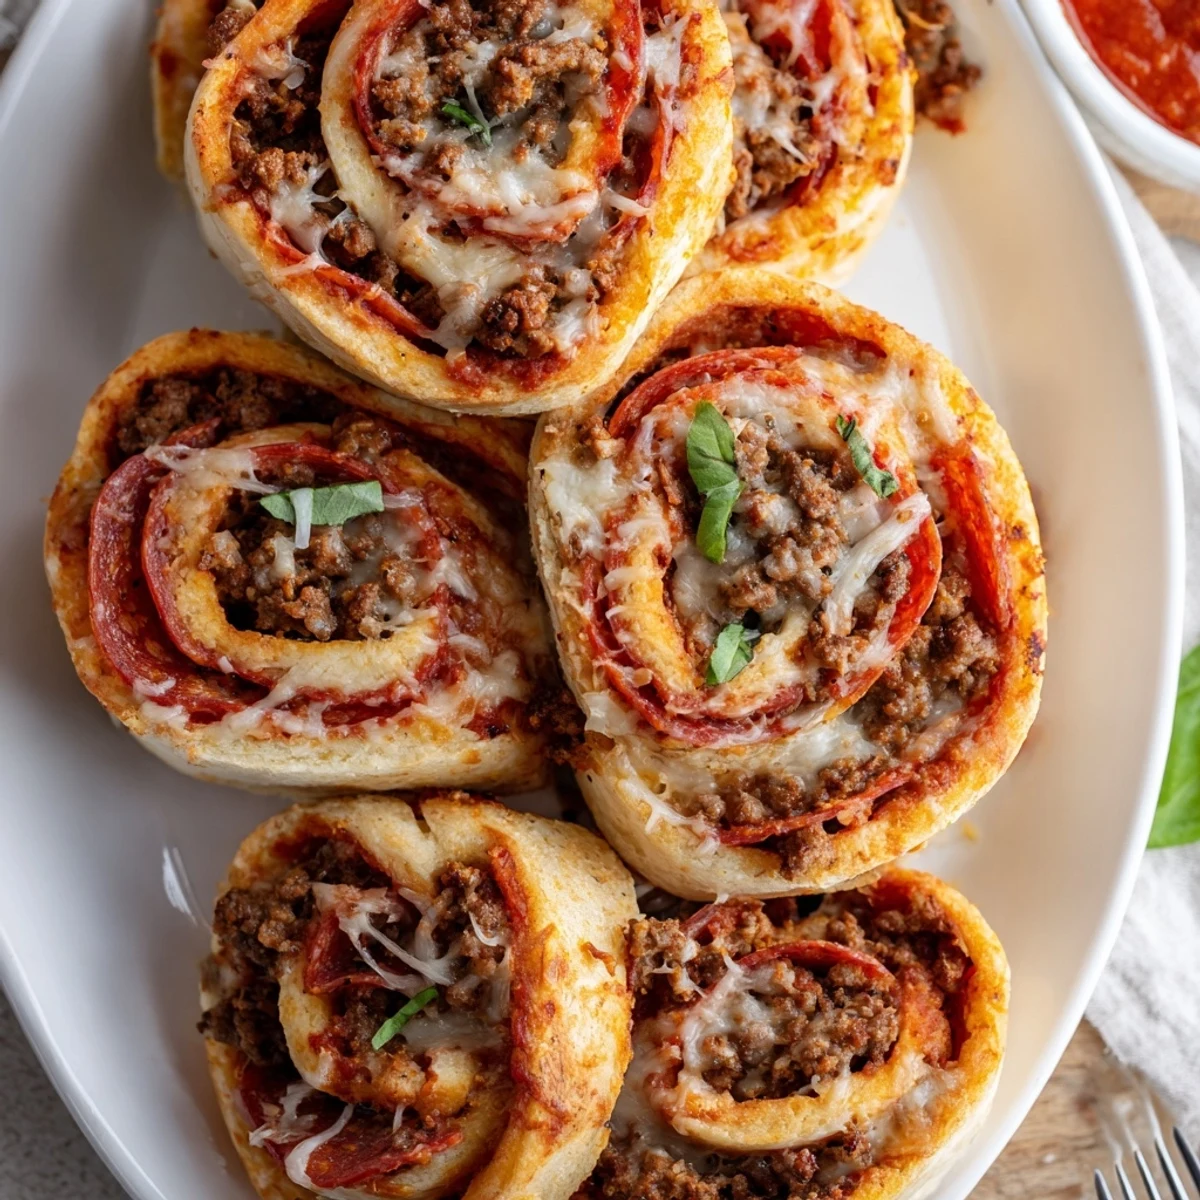
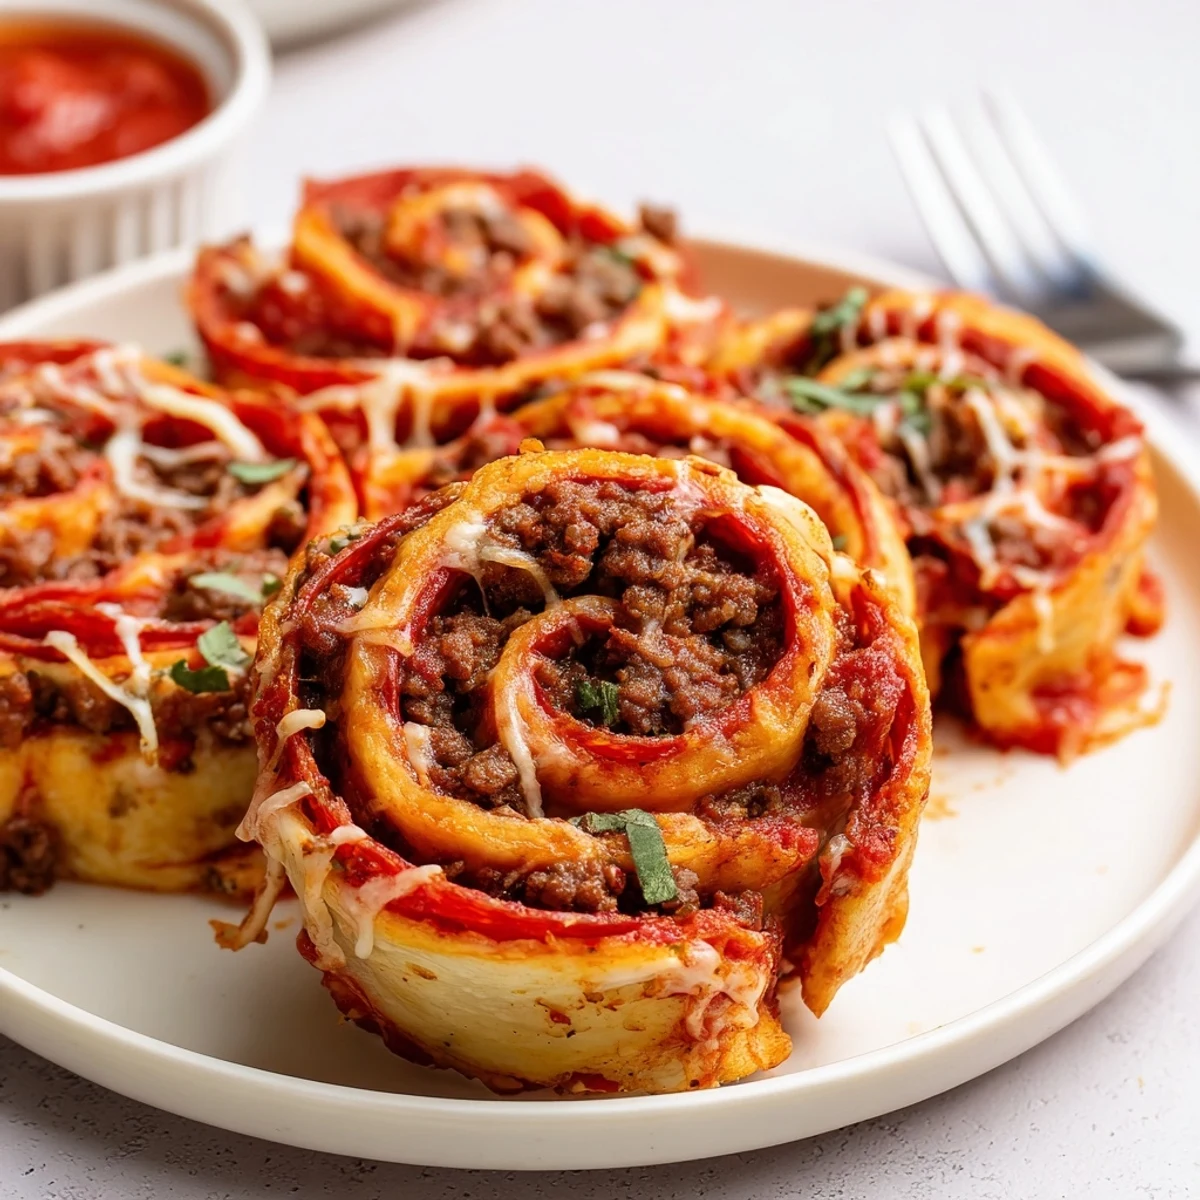
 These cheesy roll ups begin with refrigerated pizza dough spread with pizza sauce, browned seasoned ground beef, pepperoni slices and a mix of mozzarella and Parmesan. Roll tightly, cut into eight pieces, brush with olive oil and bake at 200°C (400°F) until golden and bubbly, about 12–15 minutes. Let cool briefly, garnish with basil and serve with extra sauce. Swap meats or add peppers for variation; freeze baked rolls and reheat to crisp.
Last winter, after a long Sunday spent chasing errands instead of relaxation, I was too hungry and far too impatient for anything elaborate. The distinct sizzle and savory scent of sautéing beef met the familiar pepperoni aroma, and the idea for these Cheesy Beef Pepperoni Pizza Roll Ups took shape as pure, comforting improvisation. Every part—the stretchy cheese, the warm sauce, and a little crunch—felt geared towards that undeniable craving for something both familiar and playful. They're the kind of snack I wish I'd thought up on pizza night years ago.
I tested the first batch one game night with friends who arrived expecting the usual chips and dip. A pile of golden, cheesy roll ups disappeared within minutes, and someone actually asked me to text the recipe before the match ended. We laughed over cheese pulls and watched everyone sneak 'just one more,' realizing these were already a hit. Now, they're a standing request whenever movie marathons are in play.
Ingredients
- Ground beef: Browning the beef with seasoning makes a huge flavor difference, so I always drain off just enough fat to keep things juicy without sogginess.
- Pepperoni: I layer each slice individually—it's tempting to pile them on, but too much and the roll falls apart when slicing.
- Shredded mozzarella cheese: This is where you'll get that lovely cheese pull; pre-shredded saves time but a quick grating from a block melts even better.
- Grated Parmesan cheese: It adds a salty, nutty punch worth the extra sprinkle.
- Refrigerated pizza dough: I've tried homemade, but store-bought keeps things speedy and reliably fluffy.
- Pizza sauce: Use your favorite jarred version or leftovers from another night—the sauce melds all the flavors together and keeps the dough from drying out.
- Dried Italian herbs: A quick dash lifts up all the savory notes and gives everything that classic pizzeria aroma.
- Garlic powder: Just enough to make everyone ask why it tastes so good, but not enough to overpower the other flavors.
- Salt and pepper: Always by taste; I start light and adjust after the beef browns.
- Olive oil: Brushing the tops helps achieve an irresistible, glossy golden crust.
- Chopped fresh basil or parsley (optional): It’s worth the quick garnish for a touch of color and freshness, especially if you’re serving guests.
Instructions
- Set the stage:
- Preheat your oven to 200°C (400°F) and line a baking sheet with parchment—less mess means faster snacking.
- Sizzle & season the beef:
- Add ground beef to a hot skillet, scattering in salt, pepper, Italian herbs, and garlic powder, stirring as the aroma fills your kitchen. Once browned, drain extra fat and let it cool just a bit—it shouldn't be steaming when it hits the dough.
- Roll out the dough:
- Lightly flour your surface, then open the pizza dough and pat or roll it into a good-sized rectangle, around 30 x 25 cm.
- Sauce it up:
- Spoon and spread the pizza sauce across the dough, leaving a small border; it's tempting to cover every inch but resist—sauce leaks are messy when rolling up.
- Build the layers:
- Scatter the beef first, then lay pepperoni slices gently. Sprinkle mozzarella all over and finish with Parmesan for a savory hit.
- Roll & slice:
- Tightly roll from one long side until you have a neat log; pinch the seam well to hold it together. With a sharp knife, cut into 8 pieces, cleaning the blade between cuts if the cheese gets sticky.
- Arrange & brush:
- Place each roll cut side up on your baking sheet and brush the tops lightly with olive oil until shiny.
- Bake to golden bliss:
- Slide into the oven for 12–15 minutes, peeking at the cheese—once it’s bubbling and golden, they’re ready.
- Finishing touches:
- Let the rolls cool just long enough so you don’t burn your fingertips, scatter with fresh basil or parsley, and serve with extra sauce for dunking.
 Save to Pinterest
 Watching my nephew's eyes widen at the cheesy middles is a small joy, but the best part is always sharing a plate while the kitchen smells just like a neighborhood pizzeria. That blend of crispy crust and stretchy cheese somehow makes everyone forget the rush of the day for a moment.
Getting the Dough Just Right
One lesson that came quickly: cold dough can be stubborn and snap back. Leaving it out for a few minutes before rolling makes shaping so much easier, and you get a perfect canvas for all the layers.
Making Ahead for Parties
If I'm hosting, I’ll prep the log in advance and stash it in the fridge until guests arrive. Slicing and baking just before serving keeps the rolls warm and utterly irresistible, and no one will guess how simple they were to assemble.
Small Tweaks That Make a Big Difference
An extra sprinkle of chili flakes quietly boosts the flavor for anyone who likes it a little spicy, while a bit of Parmesan over the finished rolls adds a savory, golden finish.
- Keep extra sauce warm in a small bowl for dipping—it keeps the snacking lively.
- Change up the filling with finely diced bell peppers or swap beef for turkey for lighter bites.
- Letting the baked rolls rest for a couple minutes means less melted cheese loss and easier picking up.
 Save to Pinterest
 Whether it’s a laid-back afternoon or a last-minute party, these pizza roll ups always spark a little celebration around the kitchen table. Here’s to cheese pulls and quick wins in the snack game.
Recipe FAQs
- → How do I keep the bottoms from getting soggy?
-
Drain excess fat from the cooked beef, avoid over-saucing the dough, and brush the tops with olive oil before baking. Use a preheated sheet and bake at a high temperature (200°C / 400°F) so the base crisps quickly while the cheese melts.
- → Can I swap the ground beef for another protein?
-
Yes — ground turkey or chicken are good swaps. Cook and season them the same way, then cool slightly before assembling to prevent extra moisture in the rolls.
- → What cheeses work best without making the rolls too greasy?
-
Low-moisture mozzarella combined with a little grated Parmesan gives pull and flavor without excess oil. Avoid very soft, high-moisture cheeses unless you reduce other liquids.
- → Can I prepare these ahead or freeze them?
-
Assemble and freeze raw roll slices on a tray, then transfer to a bag; bake from frozen adding a few extra minutes. You can also bake, cool, and freeze; reheat in the oven to restore crispness rather than microwaving.
- → How can I add more veggies without sogging the dough?
-
Sauté bell peppers or onions until softened and any excess liquid evaporates before adding them. Spread a thinner layer of sauce if using extra vegetables to keep the dough from getting wet.
- → How do I know when they’re done baking?
-
Bake until the exterior is golden brown and the cheese is visibly bubbly, typically 12–15 minutes at 200°C (400°F). Let the rolls rest a few minutes after baking so the cheese firms up slightly for neater slices.
