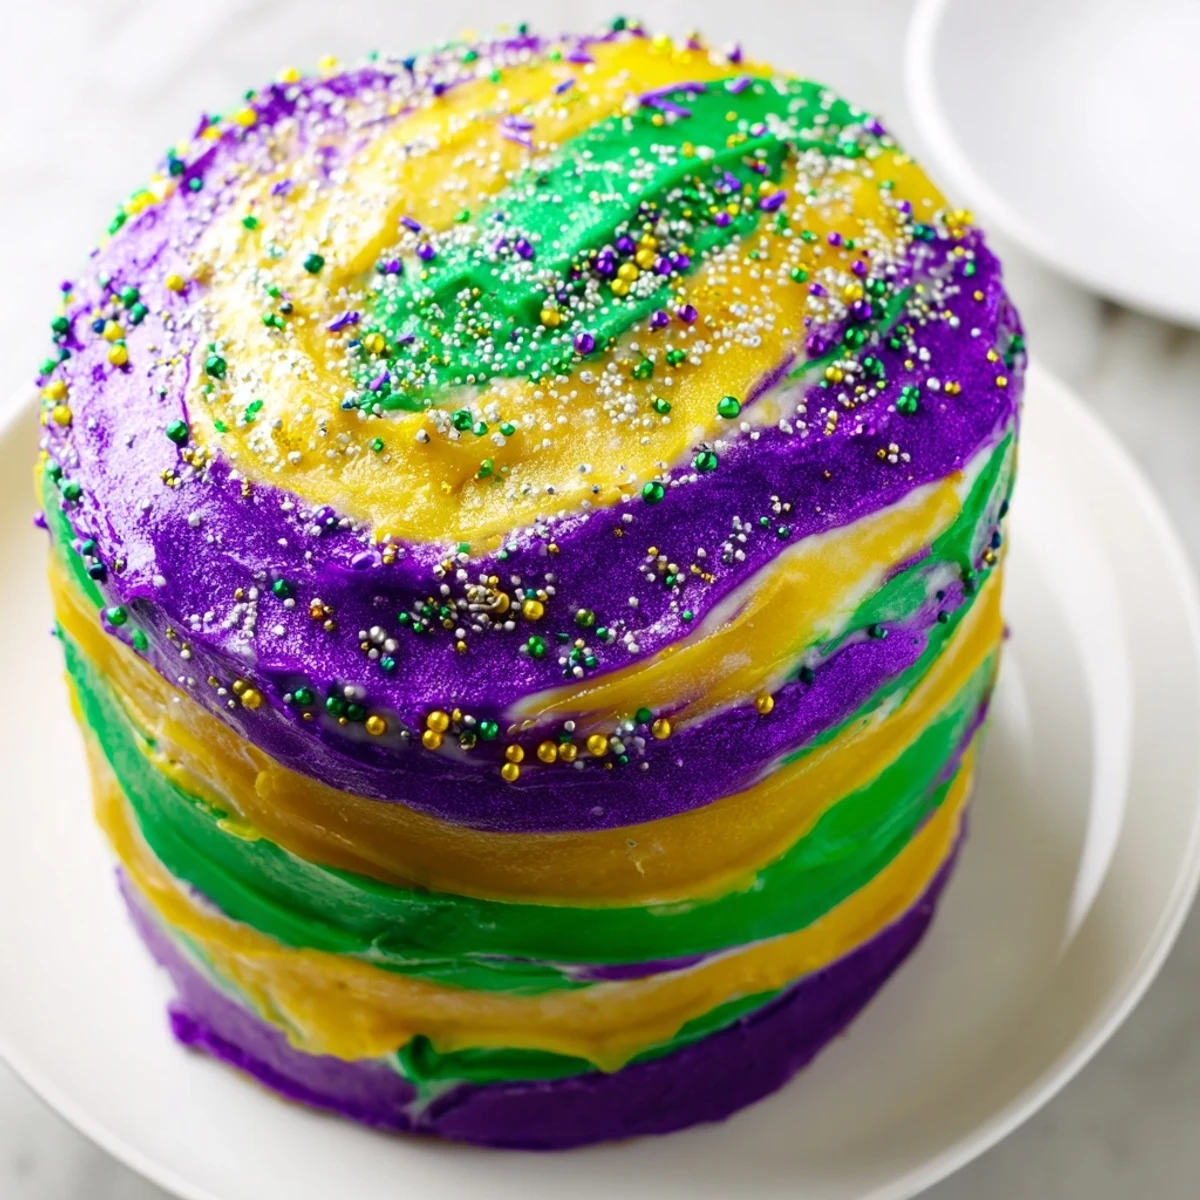
 Save to Pinterest
 This Mardi Gras treat offers a fluffy, tender crumb built from a balanced batter of flour, butter, sugar, eggs, and vanilla. The cake is baked to golden perfection before being adorned with smooth, tricolor icing in vibrant purple, green, and gold hues, made by blending butter, powdered sugar, vanilla, and milk with gel dyes. The layers create striking swirls and stripes that enhance both flavor and festivity. Best enjoyed fresh, it pairs well with light dessert wines.
Preparation includes mixing dry ingredients separately, creaming butter and sugar thoroughly, then alternating flour and milk additions to maintain a moist texture. After baking, the rich icing is divided and tinted before being applied in colorful layers to evoke the spirit of Mardi Gras. Optional garnishes like colored sugar or edible glitter add sparkle and flair.
Last February, my neighbor Sarah burst into my kitchen holding three bottles of food coloring and declared we were making a Mardi Gras cake for her book club. The butter was still cold from the fridge, and I had half a bag of flour spilled across the counter, but her enthusiasm was impossible to resist. By midnight, we had purple fingerprints everywhere and the most ridiculous, beautiful cake I've ever created.
I made this cake again for my daughter's birthday, and she insisted the purple frosting was 'magic' because it tasted exactly like the vanilla portion. Kids somehow notice these things more than adults do. Now it's become our February tradition, right when winter needs something completely over the top and cheerful.
Ingredients
- All-purpose flour: The backbone of the cake—sift it if you can, as it makes the crumb noticeably lighter
- Baking powder and salt: These work together to give the cake its lift and balance the sweetness
- Unsalted butter: Use truly softened butter, not just 'room temperature'—your finger should press into it easily
- Granulated sugar: Cream this with the butter until the mixture turns pale and almost fluffy, about three full minutes
- Eggs: Room temperature eggs incorporate better and keep the batter consistent
- Pure vanilla extract: Don't skip the good stuff here, as it shines through in every bite
- Whole milk: Adds moisture and richness—though sour cream makes it even more tender if you have it
- Powdered sugar: Sifting prevents lumps in the frosting that nobody wants to discover mid-bite
- Gel food coloring: Use gel instead of liquid, as it won't throw off your frosting consistency
Instructions
- Preheat your oven and prepare the pans:
- Heat your oven to 350°F and grease two 9-inch round pans thoroughly, including the sides—don't skip parchment paper on the bottoms, as I learned the hard way when half my cake stuck.
- Whisk your dry ingredients together:
- Combine flour, baking powder, and salt in a medium bowl, whisking until evenly blended—this seems simple but ensures every bite has the same texture.
- Cream the butter and sugar:
- Beat butter and sugar with an electric mixer for about three minutes until the mixture looks pale and fluffy—this step creates air pockets that make the cake tender.
- Add the eggs and vanilla:
- Crack in eggs one at a time, beating well after each addition, then stir in the vanilla until fully incorporated.
- Combine wet and dry ingredients:
- Add the flour mixture in three parts, alternating with milk, starting and ending with flour—mix only until the flour disappears, as overmixing makes the cake tough.
- Bake until golden:
- Divide batter evenly between the pans and bake for 30 to 35 minutes until a toothpick inserted in the center comes out clean.
- Cool completely:
- Let the cakes rest in the pans for 10 minutes before turning them onto wire racks—cooling completely before frosting prevents melting and streaking.
- Make the buttercream frosting:
- Beat softened butter until creamy, then gradually add powdered sugar, mixing until smooth before adding vanilla and just enough milk to make it spreadable.
- Divide and color the frosting:
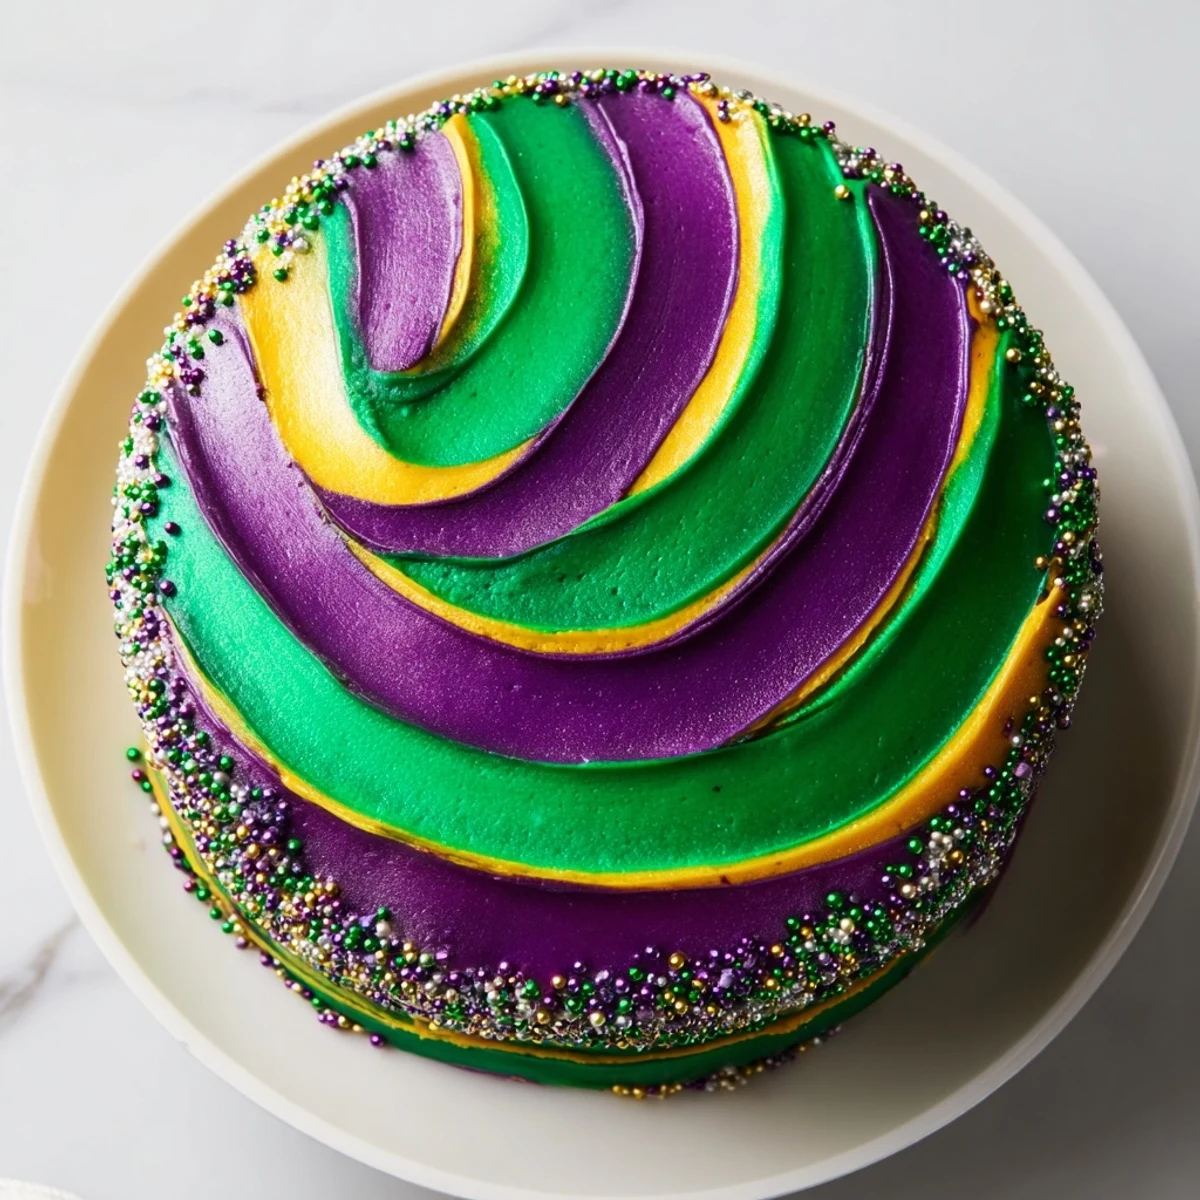
- Separate frosting into three bowls and tint one purple, one green, and one gold using gel coloring—add more than you think you need, as colors often look paler than expected.
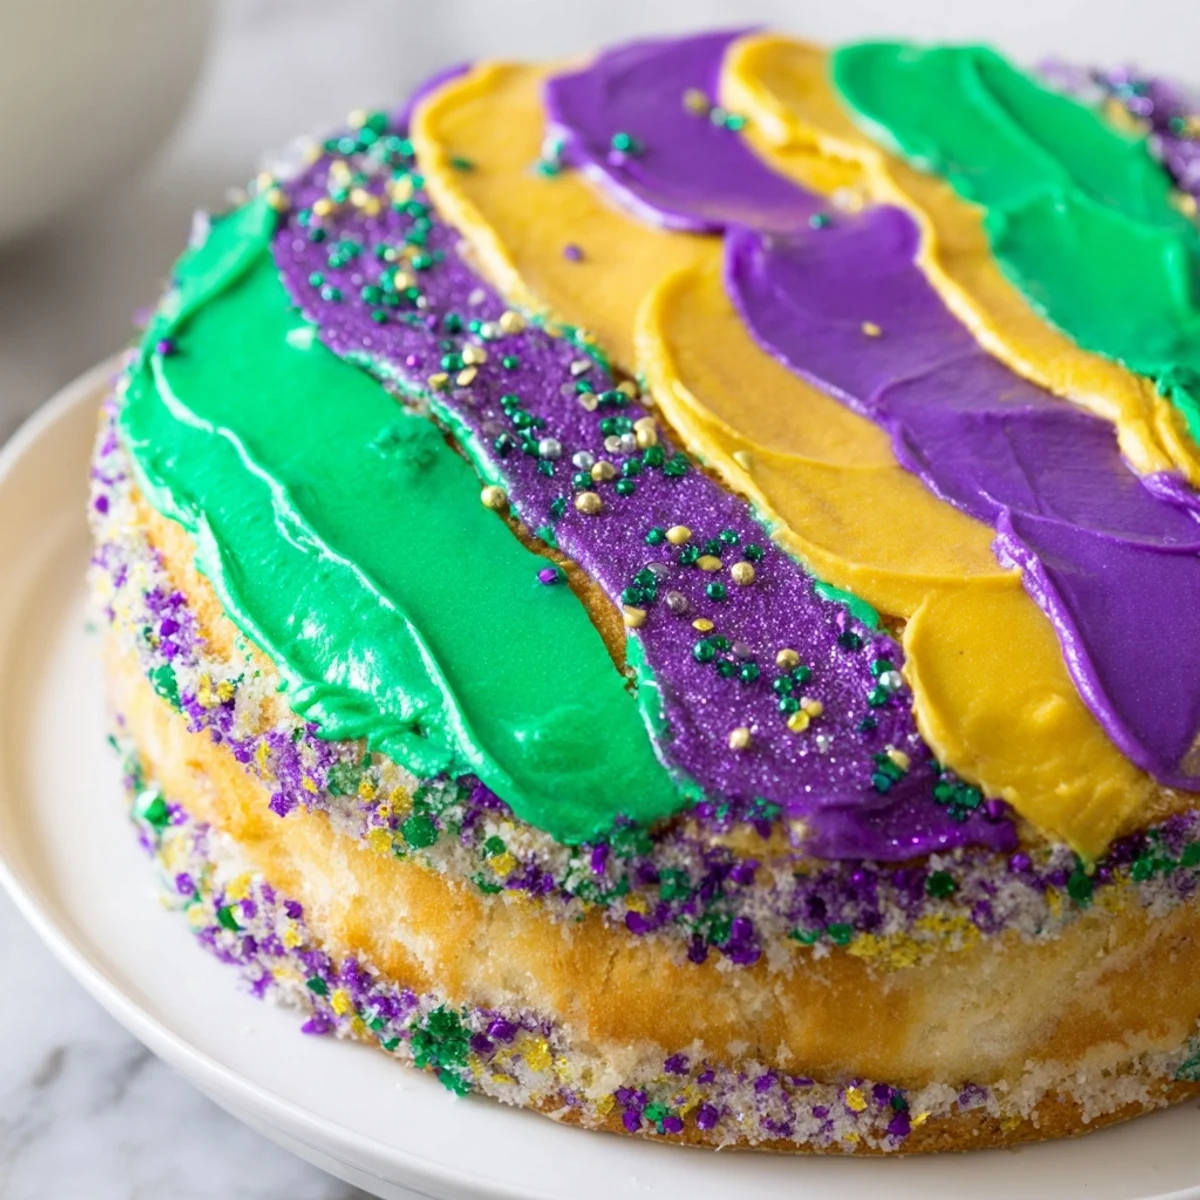
- Assemble the tricolor masterpiece:
- Place one cake layer on your serving plate, spread with any color frosting, then top with the second layer and frost the outside with stripes or swirls of the three colors.
 Save to Pinterest
 Last year I accidentally bought yellow food coloring instead of gold, and the cake still looked festive and tasted wonderful. Sometimes perfection is overrated when you're feeding people who are just happy someone baked something from scratch.
Making It Ahead
The cake layers actually develop better flavor if baked a day in advance and wrapped tightly in plastic. I've learned this through years of last-minute birthday cake stress, and the texture becomes more evenly moist overnight.
Frosting Like A Pro
When applying the tricolor frosting, work quickly and don't worry about perfection—the swirls and slight color blending are what make it festive. An offset spatula gives you more control than a regular knife, though I've used both successfully.
Serving Suggestions
This cake demands to be the centerpiece of any gathering, so put it on a cake stand or your nicest serving plate. A glass of sparkling wine or sweet dessert wine balances the richness perfectly.
- Sprinkle the top with colored sugars or edible glitter right before serving for extra sparkle
- Cut slices with a sharp knife dipped in hot water for clean edges through the colored frosting
- Leftovers keep surprisingly well for three days in an airtight container at room temperature
 Save to Pinterest
 Somehow this cake manages to taste even better the second day, as the flavors settle and the frosting softens slightly into the cake. I hope it brings a little extra joy to your table, whenever you decide to make it.
Recipe FAQs
- → What creates the fluffy texture in this cake?
-
The cake’s fluffiness comes from creaming softened butter and sugar until light, then carefully folding in eggs and alternating dry ingredients with milk to maintain moisture.
- → How do the icing colors stay vibrant?
-
Gel food coloring is used to tint the smooth buttercream icing, which keeps the purple, green, and gold hues bright without altering texture.
- → Can the cake layers be prepared in advance?
-
Yes, baking the cake layers a day ahead and wrapping them tightly helps maintain freshness and speeds up assembly on serving day.
- → What is the best way to apply the tricolor icing?
-
Divide the buttercream into three portions, tint each with a different color, then alternate spreading or swirling the colors for a festive striped effect.
- → Are there ingredient substitutions for a richer flavor?
-
Replacing half the milk with sour cream adds tang and richness to the batter without compromising texture.
