 Save to Pinterest
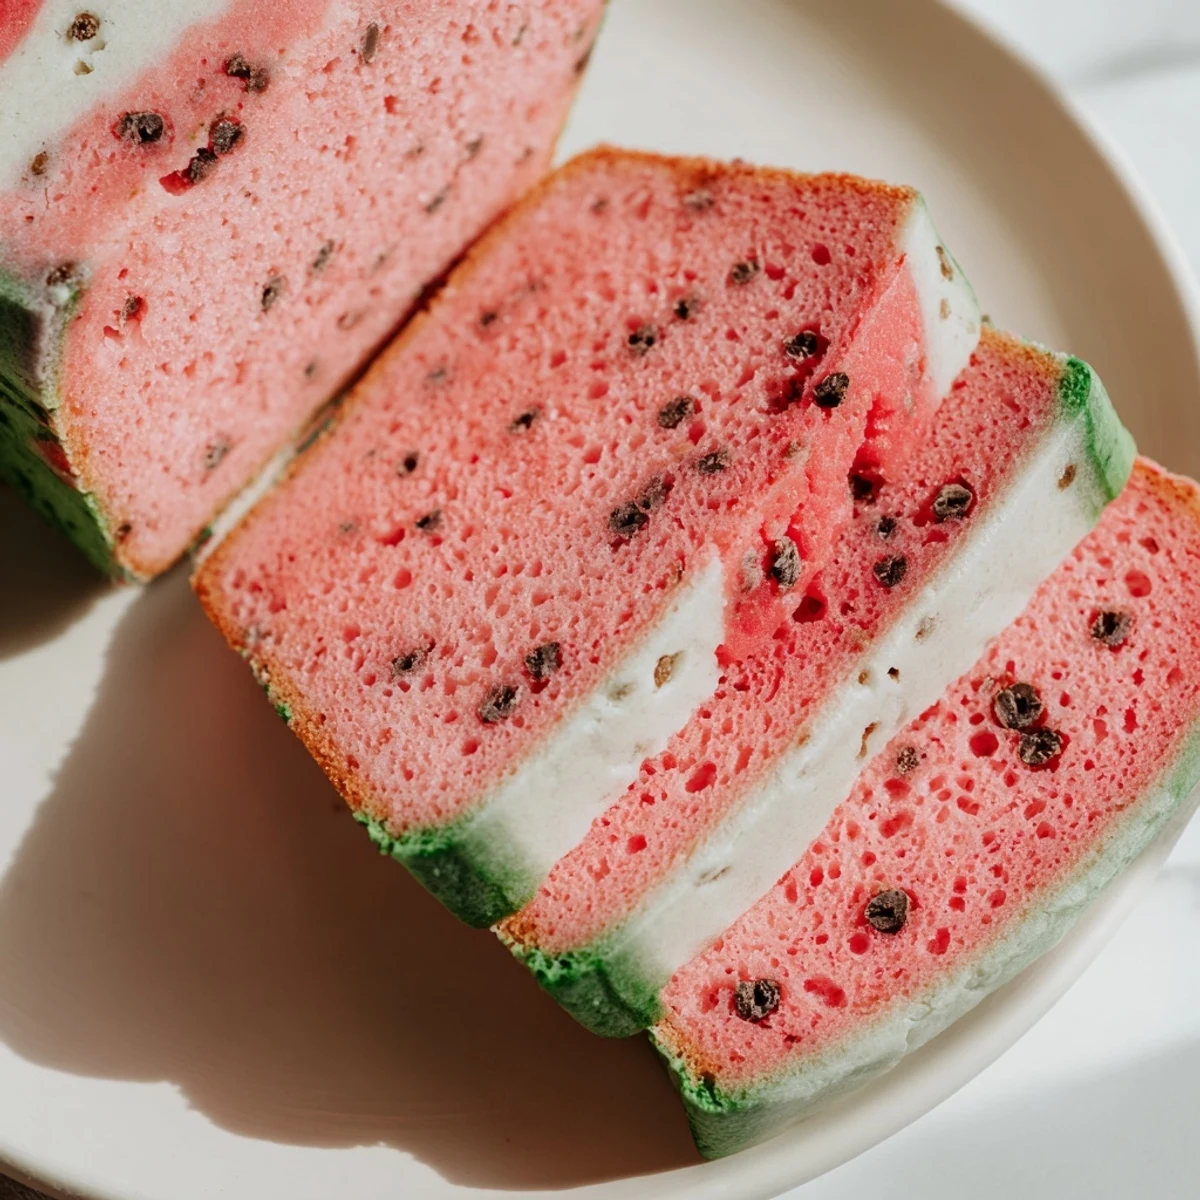
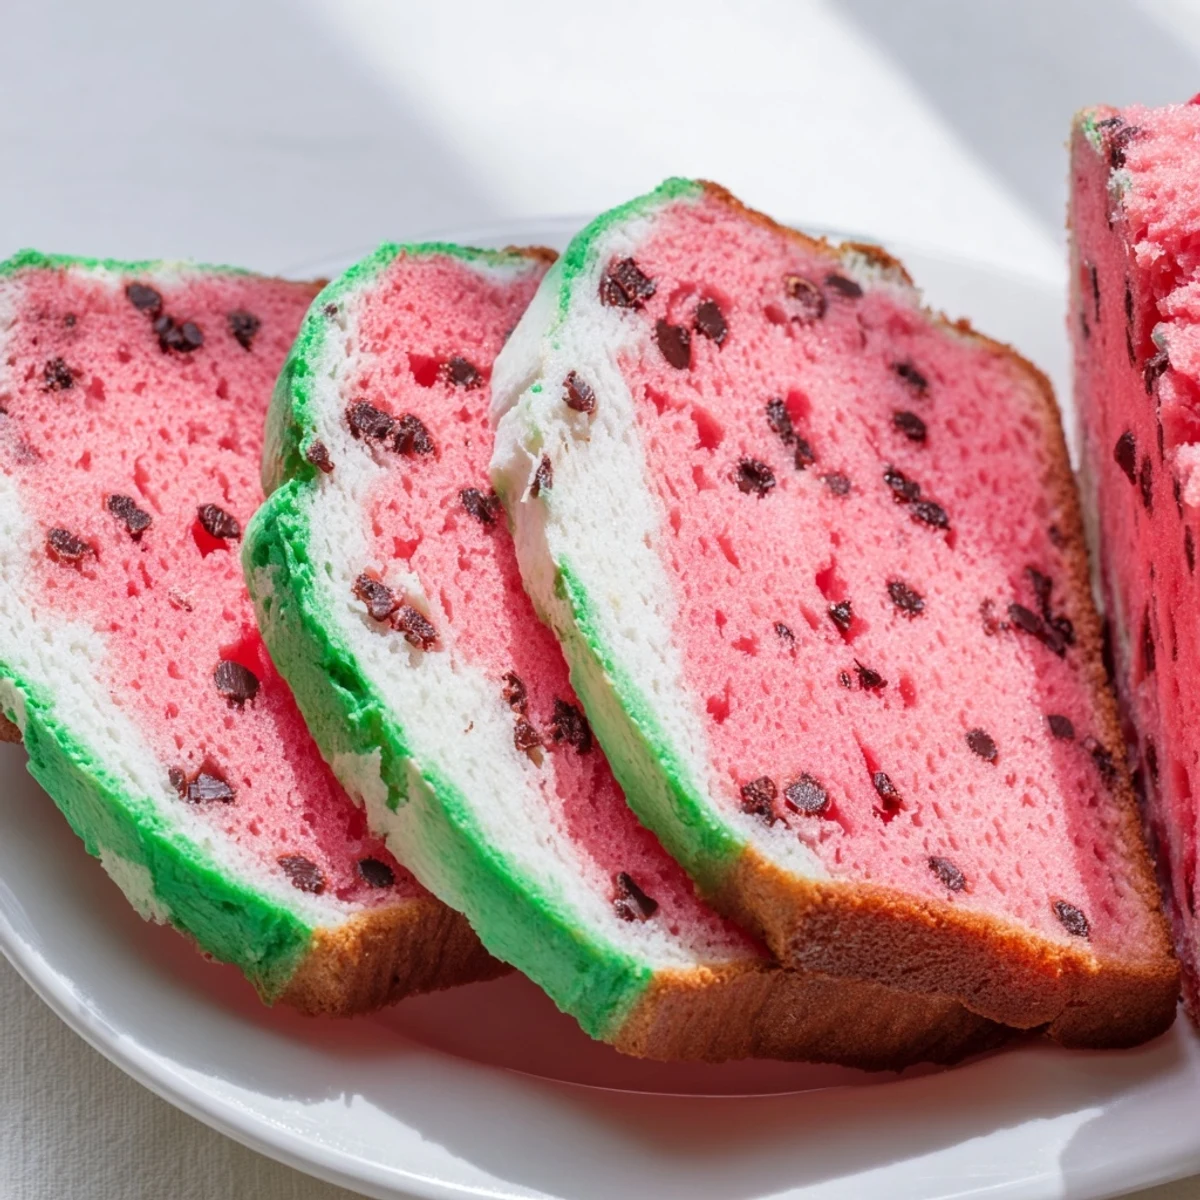
 This creative loaf combines soft, sweet dough with vibrant red, white, and green layers to mimic watermelon slices. The tender crumb gets subtle fruity notes from optional watermelon extract, while mini chocolate chips create playful seeds throughout the pink center.
The dough requires basic bread-making techniques: mixing, kneading, and two rise periods. Color division creates the signature layered appearance—60% pink flesh, 25% white rind, and 15% green skin. Gel food coloring delivers the most vibrant results, though matcha powder works beautifully for the outer layer.
Bake for 30-35 minutes until golden, then cool completely before slicing to reveal the impressive cross-section. Serve toasted with butter, use for playful sandwiches, or enjoy as a conversation-starting treat at summer parties.
Last summer my niece kept staring at my sandwich bread like it had personally offended her. Auntie, wheres the FUN bread? she demanded. That weekend we made a loaf that looked exactly like watermelon and the way her eyes lit up when I sliced it open was absolutely worth the stained countertops.
My sister threatened to never speak to me again if I didnt bake this for her Fourth of July party. Three people actually thought Id hollowed out a real watermelon until they took a bite. Now Im the designated bread artist for every family gathering.
Ingredients
- Bread flour: The protein content here is non negotiable for that pillowy tender crumb structure
- Active dry yeast: Make sure your milk is warm like bath water not hot or youll kill these little workers
- Sugar: This does double duty feeding the yeast and adding just enough sweetness without becoming cake
- Salt: Easy to forget but absolutely crucial for flavor depth and dough structure
- Warm milk: I heat it in 15 second bursts checking constantly because patience saves yeast
- Room temperature egg: Set it out before you start because cold eggs can shock the dough
- Unsalted butter: Softened means you can press your finger into it easily not melted or rock hard
- Cocoa powder: Just a touch adds richness to your green layer without making it chocolate flavored
- Matcha powder: This gives the most natural green but gel coloring works if you prefer brighter
- Red or pink gel coloring: Gel is so much more concentrated than liquid you need less mess
- Watermelon extract: Totally optional but makes the flavor match those gorgeous looks
- Mini chocolate chips: These are your seeds and they must be mini for the best effect
Instructions
- Make your dough base:
- Combine flour sugar yeast and salt in your stand mixer then pour in the warm milk egg and softened butter. Mix until everything comes together then knead on medium speed for about 8 minutes until the dough is smooth and springs back when you poke it.
- Divide and color:
- Split your dough into three portions one large roughly 60 percent one medium 25 percent and one small 15 percent. Knead red coloring and watermelon extract into the largest portion fold in chocolate chips for seeds leave the medium plain for the white rind and work green coloring into the smallest portion.
- First rise:
- Shape each colored portion into a ball and place them in separate greased bowls. Cover with plastic wrap or a warm damp towel and let them rise for about 1 hour until theyre puffy and doubled in size.
- Assemble the layers:
- Punch down each dough portion gently. Flatten the red dough into a log the length of your loaf pan then wrap the white dough completely around it. Flatten the green dough into a rectangle and wrap it around the outside pinching all seams tightly to seal.
- Second rise:
- Place your loaf seam side down in a greased 9x5 inch loaf pan. Cover loosely and let it rise for 30 to 45 minutes until its puffy and domed above the pan edges.
- Bake to perfection:
- Preheat your oven to 350°F and bake for 30 to 35 minutes. If the green crust starts browning too quickly tent loosely with foil for the last 10 minutes. The loaf should sound hollow when tapped on the bottom.
- Cool completely:
- Let the bread cool in the pan for 10 minutes then turn it out onto a wire rack. Wait until its completely cool before slicing or the steam will make the texture gummy and the slices wont be clean.
 Save to Pinterest
 The moment my daughter realized it was bread not fruit and then immediately asked if I could make pizza bread next might be my favorite parenting win this year.
Getting The Colors Right
Start with less coloring than you think you need because the shade will deepen as the dough rises. I wear gloves during this phase because nothing ruins the surprise faster than rainbow stained hands.
Rolling Technique Matters
When wrapping your layers roll gently but firmly and pinch those seams like your life depends on it. Any gaps here will become weird air pockets and might cause the layers to separate during baking.
Storage And Serving Ideas
This bread keeps surprisingly well in an airtight container for up to three days but honestly it rarely lasts that long in my house. I love it toasted with salted butter for breakfast or used for the most ridiculous looking PB and J sandwiches ever.
- Dont refrigerate it because bread actually stales faster in the fridge
- Freeze individual slices wrapped tightly for emergency fun bread
- Slice with a serrated knife using gentle sawing motions to preserve the pattern
 Save to Pinterest
 Serve this at your next summer gathering and watch peoples faces when they realize theyre about to eat watermelon bread.
Recipe FAQs
- → What does watermelon bread taste like?
-
The bread has a subtly sweet, tender crumb similar to brioche or milk bread. Watermelon extract adds light fruity notes, but the flavor is primarily mild and buttery rather than strongly fruity.
- → Can I make watermelon bread without food coloring?
-
For natural coloring, use matcha powder for the green outer layer and beet juice or strawberry powder for the pink center. The colors will be softer than gel food coloring but still create the layered effect.
- → How long does watermelon bread stay fresh?
-
Store in an airtight container at room temperature for up to 3 days. For longer storage, wrap tightly and freeze for up to 3 months. Toast slices before serving to refresh the texture.
- → Why did my colors blend together during baking?
-
Colors may bleed if the dough is too warm or over-proofed. Ensure dough is well-chilled before assembling layers, and pinch seams tightly to seal. Using gel rather than liquid coloring also helps prevent bleeding.
- → Can I use active dry yeast instead of instant yeast?
-
Yes, active dry yeast works perfectly. Just dissolve it in the warm milk for 5 minutes before adding to the dry ingredients. The rising time remains the same.
- → What can I use instead of chocolate chips for seeds?
-
Mini chocolate chips work best, but you can also use chopped dark chocolate, raisins cut into small pieces, or currants. For a seedless version, simply omit this addition.
