 Save to Pinterest
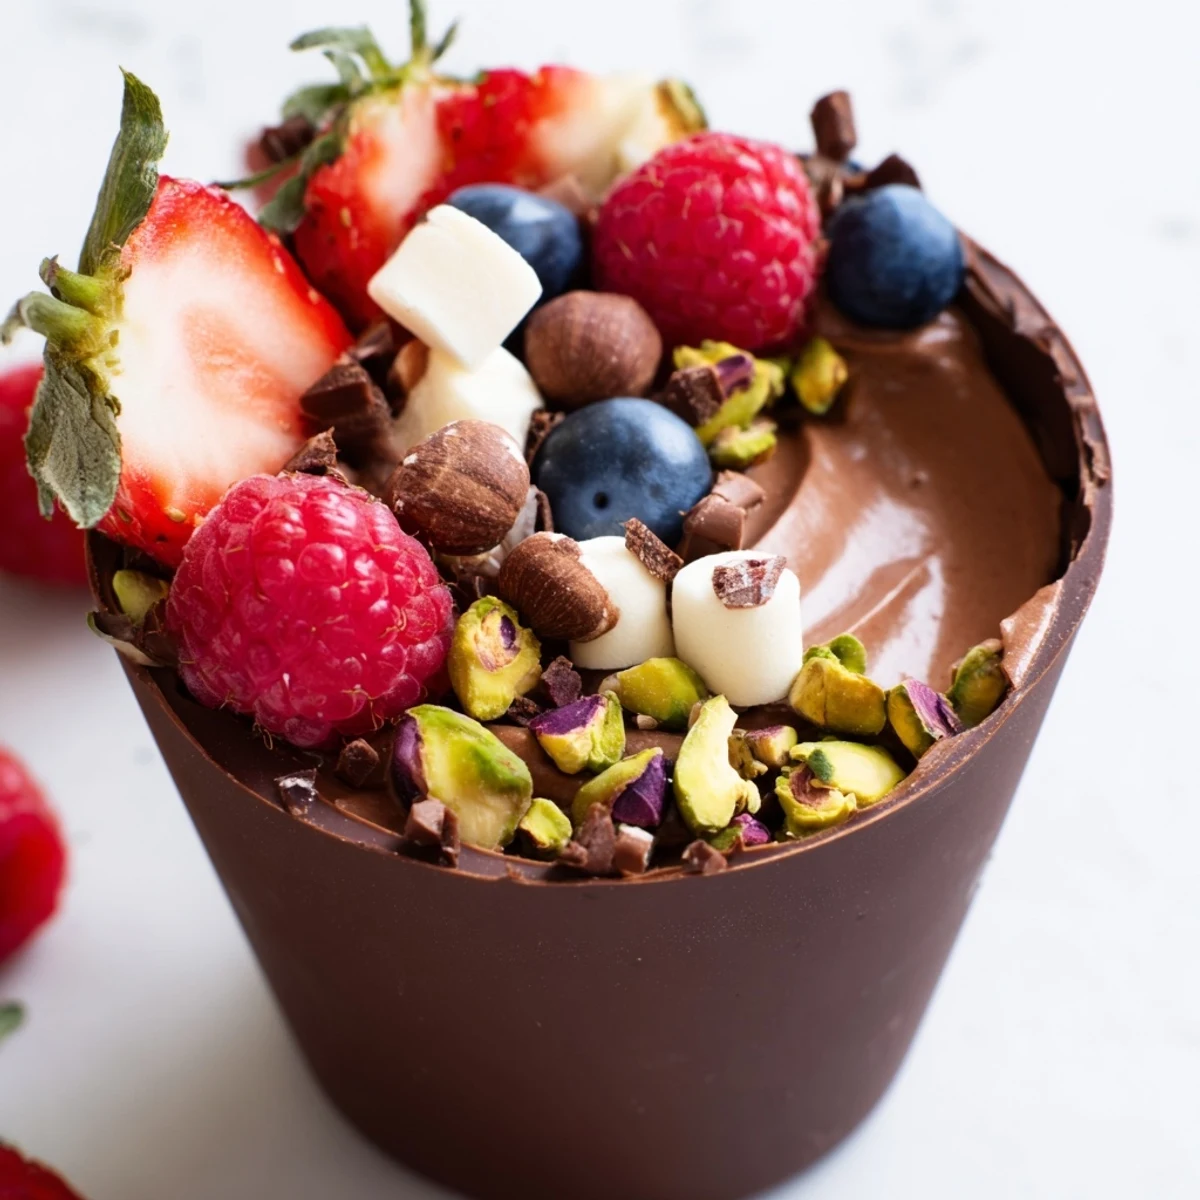
 These elegant chocolate grazing cups feature handmade dark chocolate cups filled with velvety chocolate mousse, fresh mixed berries, chopped nuts, and decadent toppings. The combination of smooth mousse and crunchy textures creates a sophisticated dessert perfect for special occasions. Each cup delivers rich chocolate flavor balanced by tart berries and nutty crunch, making them ideal for grazing tables or individual dessert service.
The first time I made chocolate cups for a dinner party, I accidentally made them too thin and they started melting in everyone's hands. We all ended up eating them with spoons, laughing as chocolate dripped everywhere. That kitchen disaster taught me everything about getting the chocolate shell just right. Now these grazing cups are my go-to when I want something that looks impressive but actually comes together in under an hour.
Last summer I set up a whole grazing table with these cups as the centerpiece. My friend Sarah, who claims she hates desserts, went back for three of them and kept asking what the secret ingredient was. Watching guests customize their own toppings became its own kind of party entertainment. Now I make extra cups because they always disappear faster than expected.
Ingredients
- 200 g dark chocolate: Go for at least 60% cocoa content here because higher quality means your cups will snap beautifully when you bite into them
- 200 ml heavy cream: Ice cold cream whips up faster and holds those delicate air pockets better than room temperature cream
- 100 g dark chocolate: This gets melted into the mousse for that intense chocolate flavor without being overwhelmingly sweet
- 2 tbsp powdered sugar: Just enough sweetness to balance the dark chocolate without making it cloying
- 1 tsp vanilla extract: Pure vanilla makes the chocolate flavor sing brighter than imitation ever could
- 1 cup fresh mixed berries: Use whatever looks freshest at the market but raspberries and strawberries work particularly well here
- 2 tbsp chopped nuts: Toast them lightly beforehand if you want that extra layer of nutty fragrance
- 2 tbsp mini marshmallows: These add playful texture and nostalgia that somehow makes everything feel more fun
- 2 tbsp chocolate curls: Use a vegetable peeler on a room temperature chocolate bar for the prettiest curls
- 1 tbsp edible gold leaf: Completely optional but turns these into something that looks restaurant worthy
Instructions
- Craft Your Chocolate Cups:
- Melt the chocolate in 30 second bursts, stirring between each one until it flows like warm honey. Paint the inside of your cupcake liners with a pastry brush, making sure to get into all the crevices, then chill until they're firm to the touch. The trick is doing two thin coats rather than one thick layer for cups that wont crack when you peel away the liners.
- Whip Up Silky Mousse:
- Melt the chocolate and let it cool until it feels barely warm to the touch. Whip that cream until it forms soft peaks that just hold their shape, then fold a spoonful into the chocolate to lighten it before gently combining everything. Take your time here because overmixing will deflate all that air you just whipped in.
- Bring Everything Together:
- Spoon or pipe the mousse into your chocolate cups, leaving room at the top for all those gorgeous toppings. Arrange the berries, nuts, marshmallows, and chocolate curls however feels beautiful to you, maybe clustering them on one side or scattering them artfully across the top. Add the gold leaf last if you are using it, touching it as little as possible.
- Let Them Settle:
- Pop the finished cups back into the fridge for at least 20 minutes so everything firms up properly. They are actually better after this short rest because the flavors meld together and the mousse becomes perfectly luxurious.
 Save to Pinterest
 My daughter helped me make a batch for her birthday and insisted on adding extra sprinkles to every single cup. Seeing her carefully place each berry with such concentration reminded me why I love cooking with kids. Those slightly messy, over decorated cups were the ones everyone fought over at the party.
Making Chocolate Work For You
Chocolate can be temperamental but it also tells you exactly what it needs. If it seizes while melting, whisking in a tiny bit of fat brings it back to smooth. When it cools too quickly for coating, a few seconds in the microwave makes it workable again. Learning to read chocolate's signals transformed my desserts from stressed attempts into confident successes.
Topping Combinations That Work
Beyond the classic berries and nuts, try crushed pretzels for salt contrast or candied citrus peel for brightness. Spicy candied ginger adds warmth that cuts through rich chocolate beautifully. Sometimes I fold a little orange zest into the mousse itself and top with candied orange slices for a sophisticated twist.
Timing Your Dessert Prep
The chocolate cups can be made two days ahead and stored between layers of parchment paper. Make the mousse the morning you need it and assemble just before serving for the best texture. Last minute assembly takes maybe fifteen minutes and feels so satisfying when everything comes together.
- Set out all your toppings in small bowls beforehand so you can decorate quickly
- Keep everything chilled until serving time because humidity makes chocolate weep
- Have extra liners ready in case any cups break during assembly
 Save to Pinterest
 These chocolate cups have become my answer to every dinner party invitation and birthday celebration. Something about breaking through that chocolate shell to discover the creamy mousse inside makes people feel genuinely spoiled.
Recipe FAQs
- → How far in advance can I make chocolate grazing cups?
-
Best made on the day of serving for optimal texture and freshness. Chocolate cups can be prepared 1-2 days ahead and stored in an airtight container. Fill with mousse and toppings within 4-6 hours of serving to prevent the chocolate from softening or berries from becoming mushy.
- → Can I use milk or white chocolate instead of dark?
-
Absolutely. Milk or white chocolate works beautifully for both cups and mousse. Keep in mind white chocolate requires gentler handling as it seizes more easily than dark chocolate. Milk chocolate creates a sweeter, creamier profile while white offers delicate vanilla notes.
- → What other toppings work well in grazing cups?
-
Fresh berries, chopped nuts, mini marshmallows, and chocolate curls are classic choices. Consider adding crushed cookies, pretzel bits for salt contrast, shredded coconut, candied citrus peel, or even small pieces of brownie or cake for extra indulgence and variety.
- → Do I need special equipment to make chocolate cups?
-
No special equipment required beyond silicone or paper cupcake liners, a microwave or double boiler for melting, and a pastry brush or spoon for coating. Silicone liners work best as they peel away easily from set chocolate without damaging the cup shape.
- → How do I prevent chocolate cups from cracking or breaking?
-
Ensure chocolate is properly tempered and completely chilled before removing liners. Apply an even, thick enough layer (about 1/8 inch) to prevent fragile spots. Work in a cool room and handle chilled cups gently. If cracks occur, patch with melted chocolate before filling.
- → Can I add alcohol to the chocolate mousse?
-
Orange liqueur, coffee liqueur, or dark rum complement chocolate beautifully. Add 1-2 tablespoons to the melted chocolate before folding into whipped cream. The alcohol should be cooled or at room temperature to prevent seizing the chocolate. Adjust sweetness accordingly as liqueur adds sugar.
