 Save to Pinterest
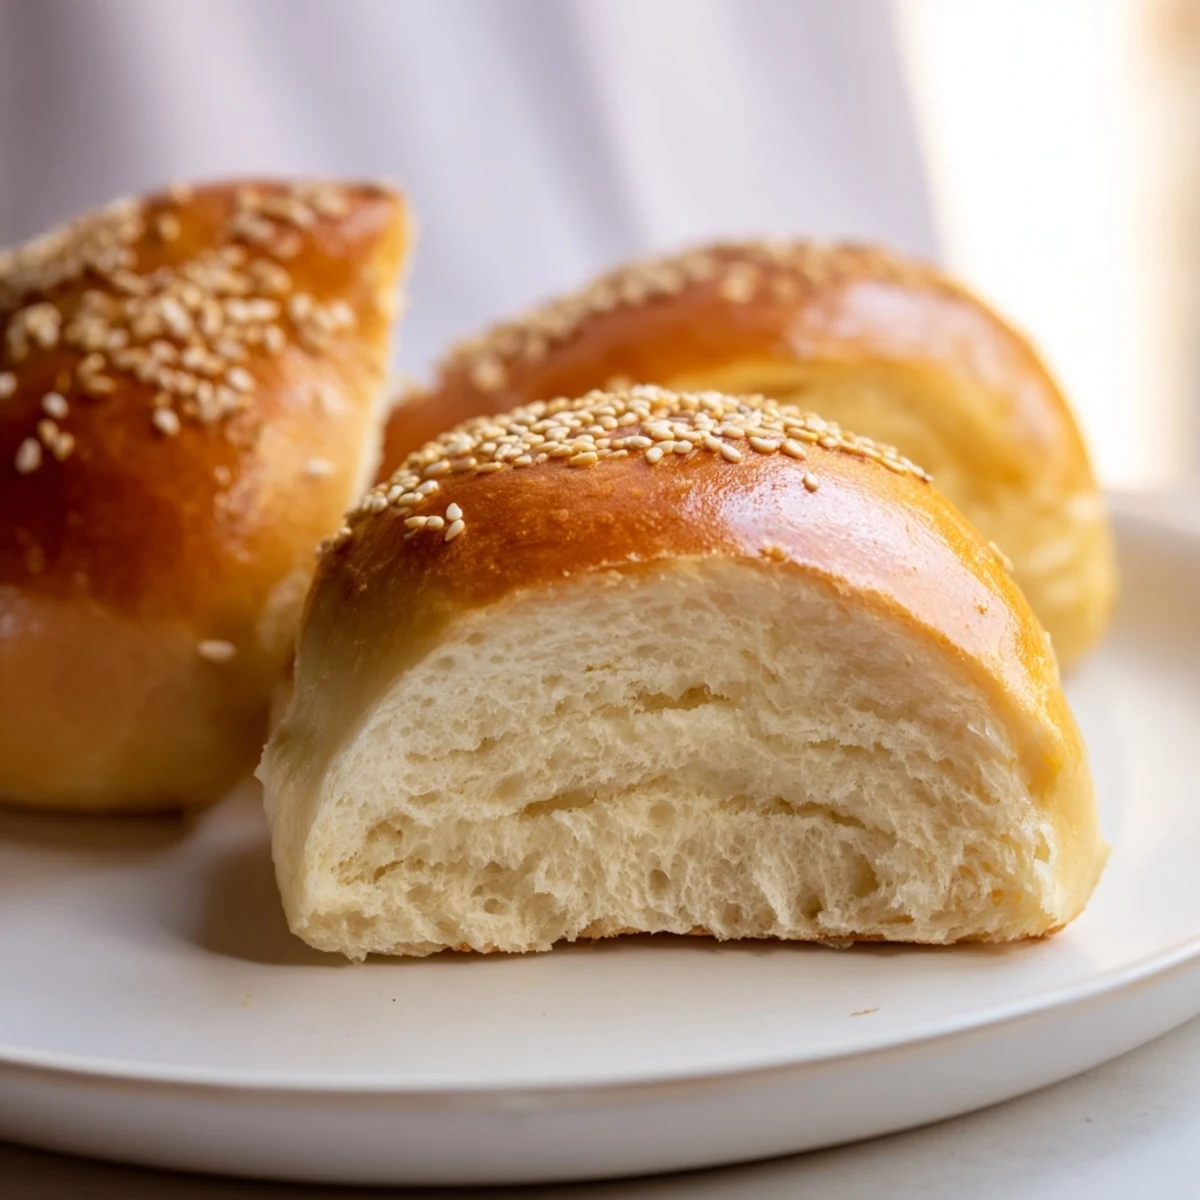
 These soft, pillowy hot dog buns get their irresistible texture and subtle tang from sourdough discard. Perfect for using up unfed starter, they bake up golden brown with a tender crumb that stands up perfectly to juicy dogs and all the toppings. The dough comes together quickly, rises beautifully, and yields eight substantial buns that freeze beautifully for future cookouts.
The smell of yeast blooming in warm milk always pulls me back to my first apartment kitchen, where I learned that patience and flour make magic happen. These sourdough discard hot dog buns started as an experiment to avoid wasting my starter, and now they've completely ruined store-bought buns for everyone in my family. There's something deeply satisfying about turning what would be compost into the softest, most flavorful bread you've ever tasted.
Last summer I made these for a neighborhood cookout and watched my neighbor's eyes widen when he took his first bite. He stood there by the grill, bun in hand, and asked me what bakery I'd visited that morning. Seeing people genuinely surprised by homemade bread never gets old, especially when it's something as simple as a hot dog bun elevated from ordinary to extraordinary.
Ingredients
- Sourdough discard (unfed, 100% hydration): This is where all that incredible flavor comes from, and using unfed starter means you're getting that tang without having to feed and wait
- Warm milk: I've tried water, but milk gives these buns a richness and tenderness that's worth every penny, plus it helps the yeast activate like crazy
- Unsalted butter, melted: Don't even think about skipping the butter brush at the end, it's what makes the crust soft instead of tough and gives you that bakery shine
- Sugar: Just enough to help the yeast work its magic and give the barest hint of sweetness that balances the sourdough tang
- Large egg: This creates structure and helps the buns rise beautifully while keeping them tender
- Salt: Essential for flavor and it helps control the yeast, so don't be tempted to skip it
- All-purpose flour: Start with 3 3/4 cups and only add more if the dough is impossibly sticky, you want it tacky not dry
- Instant yeast: Because none of us have time to proof active dry yeast separately, instant just works and works reliably
Instructions
- Wake up the yeast:
- Combine the warm milk, sugar, and yeast in a large mixing bowl and let it sit for 3–5 minutes until you see little bubbles forming on top, that's how you know it's alive and ready to work
- Mix in the good stuff:
- Add the sourdough discard, melted butter, egg, and salt to the yeast mixture and mix until everything is well combined
- Bring in the flour:
- Gradually add the flour one cup at a time, mixing after each addition, until you have a soft, tacky dough that holds together but still feels slightly sticky to the touch
- Work it:
- Knead the dough on a lightly floured surface for 7–8 minutes until it's smooth, elastic, and springs back when you poke it with your finger
- Let it rest:
- Place the dough in a lightly greased bowl, cover it with a clean towel, and let it rise until it's doubled in size, about 1–1.5 hours depending on how warm your kitchen is
- Shape them up:
- Punch down the dough gently and divide it into 8 equal pieces, then roll each piece into a smooth log about 6 inches long, tucking the ends under for a neat shape
- Second rise:
- Place the shaped buns on a parchment-lined baking sheet about 2 inches apart, cover them, and let them rise until they're puffy and doubled, about 30–45 minutes
- Get ready to bake:
- Preheat your oven to 375°F while the buns finish their second rise, positioning the rack in the center for even cooking
- Add the finishing touches:
- Brush the buns with milk and sprinkle with sesame seeds, poppy seeds, or everything seasoning if you want that extra something special
- Bake to golden perfection:
- Bake for 18–20 minutes until the tops are a beautiful golden brown and they sound hollow when tapped on the bottom
- The secret step:
- Remove them from the oven and immediately brush with melted butter, then let them cool completely before slicing to keep them from getting squished
 Save to Pinterest
 These buns have become my go-to contribution to potlucks and cookouts because they're the kind of thing people remember. Last summer my brother actually asked if I could bring just the buns, no hot dogs needed, because he'd been eating them with butter and jam for breakfast all week after I'd shared a batch.
Making Them Ahead
You can absolutely make the dough the night before and let it do its first slow rise in the refrigerator. The cold fermentation actually develops even more flavor, and in the morning you just shape them and let them come to room temperature before baking. I've discovered that this technique makes the sourdough tang even more pronounced and wonderful.
Freezing For Later
Once cooled completely, these buns freeze beautifully wrapped individually in plastic and then popped into a freezer bag. Just thaw them on the counter for an hour and they're nearly as good as fresh. I always double the recipe now because having homemade buns ready to go feels like having a secret weapon in my kitchen.
Getting The Perfect Shape
The key to uniform buns is using your kitchen scale to divide the dough into exactly equal portions. Roll each piece into a tight ball first, then gently roll it into a log, using the heels of your hands to create even pressure. If you're making them for a party, get everything ready the day before and just bake them fresh that morning.
- Don't stress if they're not perfectly uniform, homemade buns are supposed to look rustic and charming
- If you want extra soft buns, brush them with butter twice, once right out of the oven and again after about 5 minutes of cooling
- These freeze beautifully so go ahead and double the recipe while you're already making a mess of your kitchen
 Save to Pinterest
 There's nothing quite like pulling these buns fresh from the oven, that buttery aroma filling the whole kitchen. Trust me, once you make them yourself, you'll never go back to store-bought again.
Recipe FAQs
- → Can I make these buns without sourdough discard?
-
Yes, simply replace the sourdough discard with an equal amount of flour and water mixture, or increase the flour slightly and add a tablespoon more milk.
- → How should I store leftover buns?
-
Store cooled buns in an airtight container at room temperature for up to 3 days, or freeze for up to 3 months. Thaw frozen buns at room temperature or warm briefly in the oven.
- → Can I make these as hamburger buns instead?
-
Absolutely! Shape the dough into 6-8 round patties instead of logs and flatten slightly before the final rise. Adjust baking time as needed.
- → Why is my dough too sticky or too dry?
-
Flour absorption varies by brand and humidity. Start with 3 ¾ cups and add more only if needed. The dough should be soft and tacky but not sticking heavily to your hands.
- → Can I make these dairy-free?
-
Yes! Substitute the milk with your favorite plant-based milk and use vegan butter or olive oil instead of dairy butter. The texture will remain just as soft and delicious.
- → What if I don't have instant yeast?
-
Active dry yeast works perfectly—just dissolve it in the warm milk with the sugar and let it sit for 5-10 minutes until foamy before proceeding with the recipe.
