 Save to Pinterest
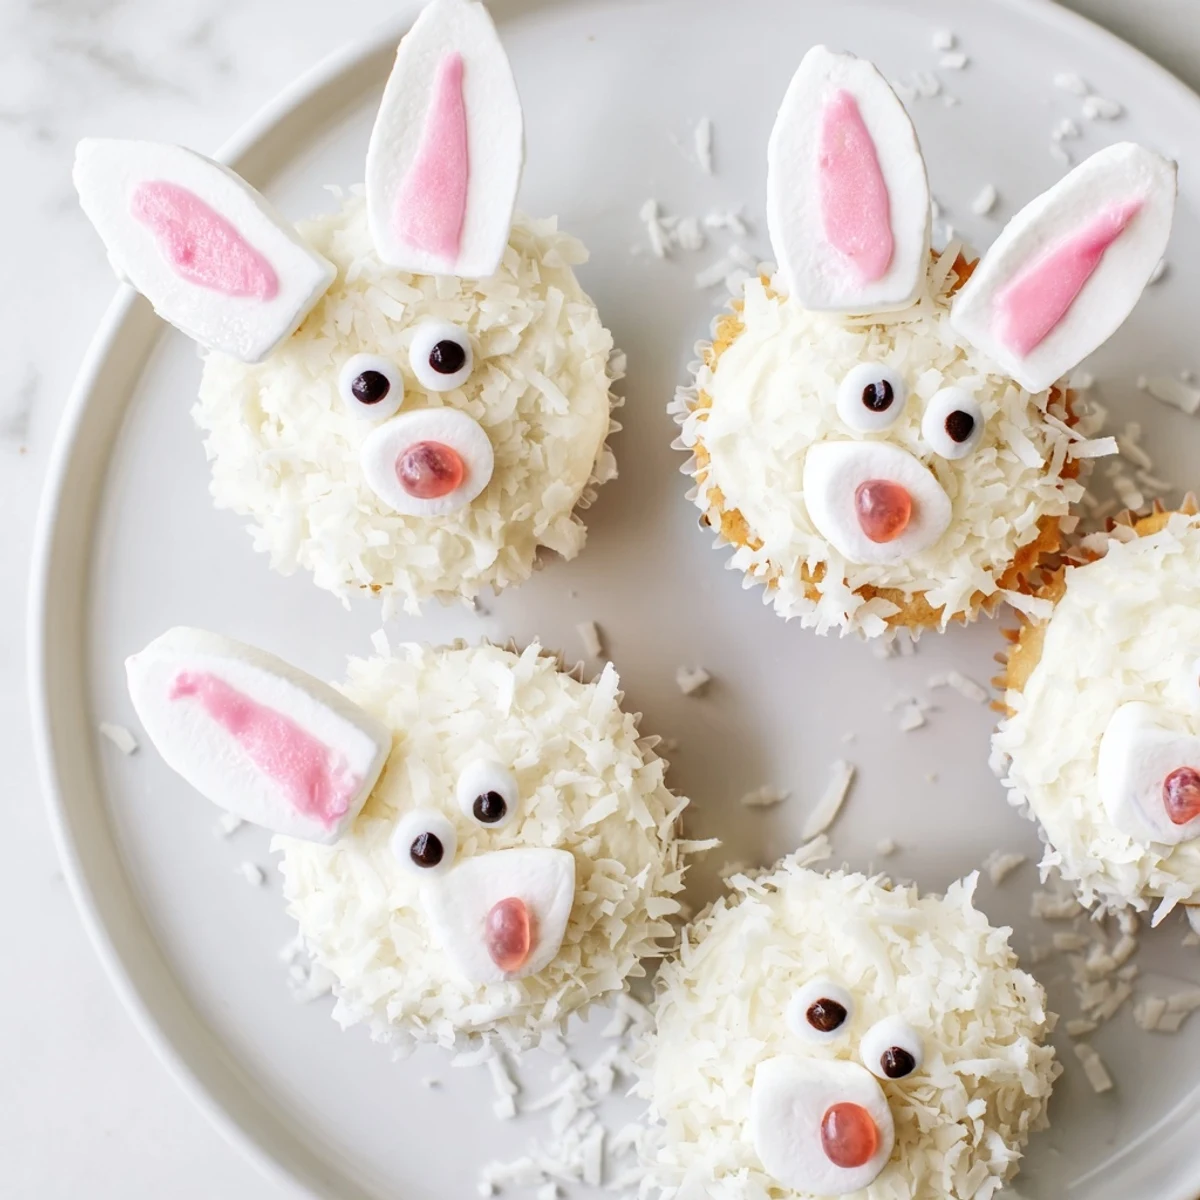
 These delightful bunny cupcakes feature moist vanilla bases topped with creamy buttercream frosting. The coconut coating creates a fluffy fur effect, while marshmallow ears dipped in pink sugar add the perfect bunny touch. Candy eyes and jelly bean noses bring these cute treats to life. Ideal for Easter brunch, spring birthday parties, or any festive gathering needing a whimsical dessert centerpiece.
The kitchen counter looked like an absolute disaster zone, but honestly, that's half the fun of these bunny cupcakes. My niece and I made them last Easter, and there was coconut everywhere — in our hair, on the floor, somehow even on the dog. The giggles were nonstop, especially when she accidentally made a bunny with three ears.
My friend Sarah brought a version of these to our spring potluck last year, and they disappeared within minutes. Everyone was fighting over the last bunny, which honestly says everything about how adorable and delicious they are.
Ingredients
- All-purpose flour: The foundation for tender cupcakes that hold up beautifully under all that festive decoration
- Baking powder: Gives these cupcakes their perfect rise so they're fluffy but still sturdy enough to support those adorable ears
- Unsalted butter: Room temperature butter is absolutely non-negotiable here — it creates the silky texture that makes both cake and frosting feel luxurious
- Granulated sugar: Sweetens the batter while also creating that lovely tender crumb structure
- Eggs: Bind everything together and add richness, so bring them to room temperature before you start mixing
- Pure vanilla extract: Don't skimp here — high-quality vanilla makes the simple flavor profile taste special and homemade
- Whole milk: Adds moisture and helps create a tender crumb that's never dry or dense
- Powdered sugar: Creates that smooth, pipeable buttercream that holds its shape when you start decorating
- Shredded sweetened coconut: This transforms ordinary frosted cupcakes into fuzzy little bunnies with the most convincing texture
- Mini marshmallows: Cut diagonally and dipped in sugar, these become the most precious floppy bunny ears you've ever seen
- Pink sanding sugar: Adds that perfect flush of color to the bunny ears and makes them look wonderfully detailed
- Candy eyes: These bring your bunnies to life instantly, though mini chocolate chips work beautifully as a backup option
- Pink jelly beans: The perfect pert little noses that give each bunny its own personality
Instructions
- Preheat your oven and prepare the pan:
- Get your oven to 350°F and line a 12-cup muffin tin with liners — choose pastel colors if you have them for extra spring vibes.
- Mix the dry ingredients:
- Whisk together flour, baking powder, and salt in a medium bowl until everything's evenly distributed.
- Cream the butter and sugar:
- Beat butter and sugar until the mixture looks pale and fluffy — this takes about 3 minutes and creates the perfect texture.
- Add eggs and vanilla:
- Add eggs one at a time, beating thoroughly after each, then stir in the vanilla until everything smells amazing.
- Combine wet and dry ingredients:
- Add the flour mixture in three batches, alternating with milk, mixing gently until just combined to keep the cupcakes tender.
- Bake to perfection:
- Divide batter among liners and bake for 18–20 minutes until a toothpick comes out clean, then cool completely on a wire rack.
- Make the buttercream:
- Beat butter until creamy, then gradually add powdered sugar, milk, vanilla, and salt until you have smooth, fluffy frosting.
- Frost and coat with coconut:
- Frost each cooled cupcake generously with buttercream, then dip the top into shredded coconut for that fluffy fur effect.
- Create the bunny ears:
- Cut mini marshmallows in half diagonally and dip the sticky cut side into pink sanding sugar for the perfect ear detail.
- Assemble the bunny faces:
- Insert two ears into each cupcake, then add candy eyes, a pink jelly bean nose, and extra coconut for fluffy cheeks.
 Save to Pinterest
 These became an instant tradition in my house after that first chaotic afternoon. Now whenever spring rolls around, my niece asks if we're making the bunnies again — and I always say yes, coconut mess and all.
Making Them With Kids
Let kids handle the decorating part while you manage the baking. They love dipping the marshmallows in pink sugar and deciding where each bunny's eyes should go. Just accept that some will look a little quirky — that's part of their charm anyway.
Prep Ahead Strategy
You can bake cupcakes and make buttercream a day ahead, keeping everything covered at room temperature. Wait to add the coconut and decorations until just before serving so the bunny ears stay perky and the coconut stays fluffy.
Storage Solutions
Store finished cupcakes in an airtight container at room temperature for up to two days. If you need to refrigerate them, bring to room temperature before serving so the buttercream softens up again.
- Place a piece of bread in the container if cupcakes need to stay soft longer
- Use a tall container so the bunny ears don't get squished
- Add decorations the same day you plan to serve them for the freshest look
 Save to Pinterest
 There's something magical about turning simple ingredients into something that makes people smile before they even take a bite. That's the real beauty of these bunny cupcakes — they're sweet in every way that matters.
Recipe FAQs
- → How far in advance can I make these?
-
Prepare cupcakes and frosting up to two days ahead. Store unfrosted in an airtight container. Add decorations within 24 hours for best texture and appearance.
- → Can I use store-bought frosting?
-
Yes, canned vanilla frosting works perfectly. Simply warm slightly for smoother application. The coconut coating hides minor imperfections beautifully.
- → What if I can't find candy eyes?
-
Mini chocolate chips make excellent eyes. Place them point-side down for a glossy eye effect, or use small dots of chocolate frosting piped carefully.
- → How do I transport these without damaging decorations?
-
Use a cupcake carrier with individual compartments or a shallow cardboard box. Keep cupcakes level and cool. The coconut helps protect the frosting during transport.
- → Can I make these gluten-free?
-
Substitute all-purpose flour with a 1-to-1 gluten-free flour blend. Ensure all decorations and marshmallows are certified gluten-free. Texture remains excellent.
- → What other decorations work well?
-
Pink heart sprinkles for noses, white chocolate chips for eyes, or shredded white chocolate instead of coconut. Licorice strings can create whiskers for extra detail.
